How to Screen record on mac with audio
Key Points: Three easiest ways to Screen record on Mac with Audio are
- Using Microphone and QuickTime Player
- Internal audio with black hole plugging
- Using Third Party Options
You are a tech-savvy content creator, a passionate gamer who loves sharing epic moments, or just someone who loves preserving memories, screen recording on Mac with audio adds an exciting dimension to your computer endeavours. Luckily, Your Mac comes equipped with handy tools right out of the box, and there are also plenty of cool apps you can grab to make screen recording a breeze. Let’s take a closer look at how you can capture your screen like a pro on Mac, I will guide you to do it effectively.
How to Screen Record on Mac with audio:
Screen recording your Mac screen is very easy with the built in tool. You can also snag some third-party app from website. Each method has its perks and drawbacks, so let’s dive in and check out both
Screen record on Mac with audio through microphone
- “Open” QuickTime Player, (You can find it in the Applications folder or use Spotlight search (Cmd + Space) to locate it quickly.)

- Now, Go to the “File” menu in QuickTime Player and select “New Screen Recording”
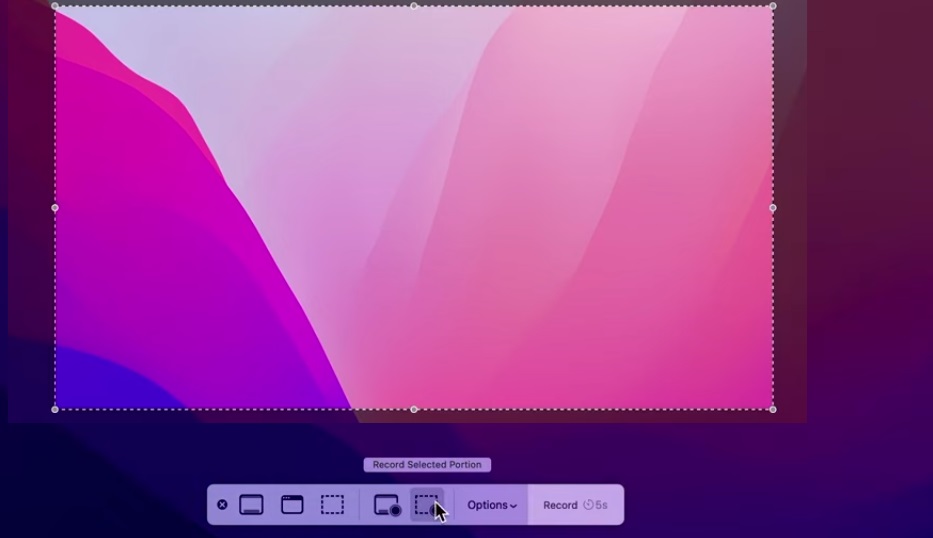
- Now customize your screen for recording, select a specific are or the entire screen
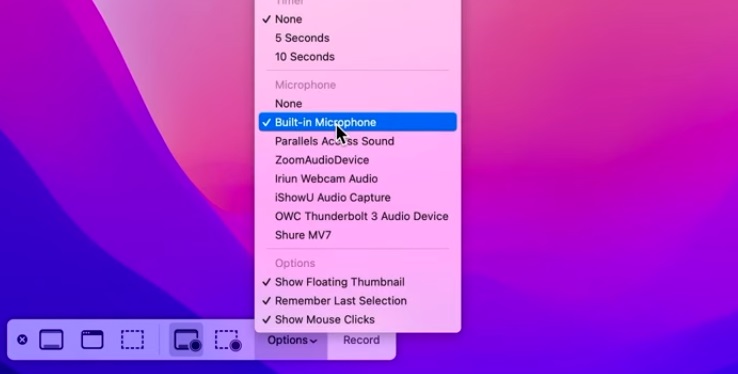
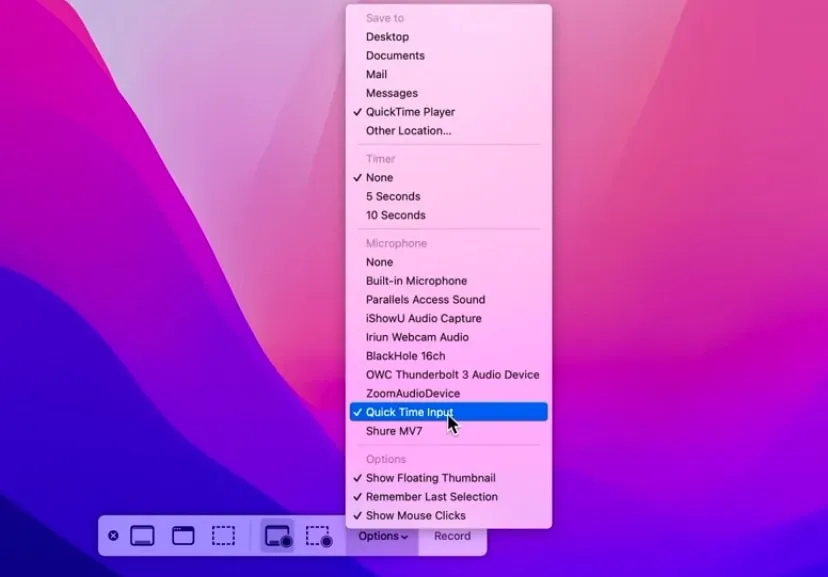
- Choose “audio input” sources (microphone or system audio) using the “options”
- You can select other options like “time interval” or location where the video gets saved by clicking on the “options”
- Now simply click “record”
- There is a“stop” sign on the top, click to stop the recording, and the video will be saved to the selected place.
Screen record on Mac with internal audio:
QuickTime can easily screen record with audio input from your microphone, however to record internal audio, like the game play voice, you have to rely on following additional steps
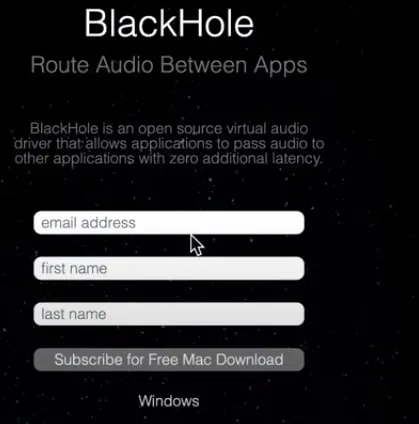
- “Download” black hole plugging (compatible with QuickTime) by entering the detail
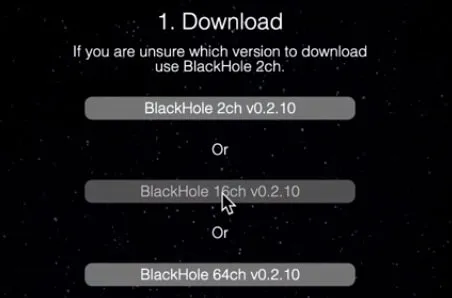
- “Select” 16 channel black hole option
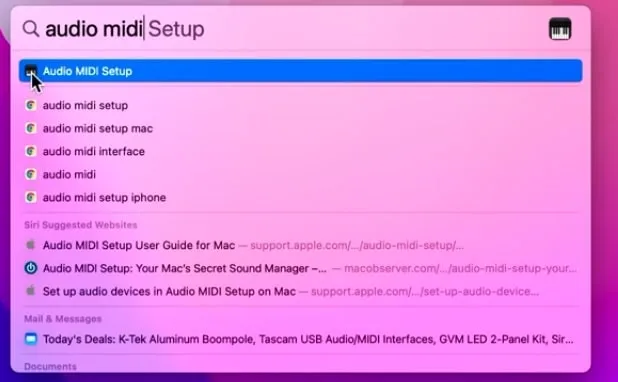
- Search for “audio midi setup” in the search bar
- Click “+” sign and select “create aggregate device”
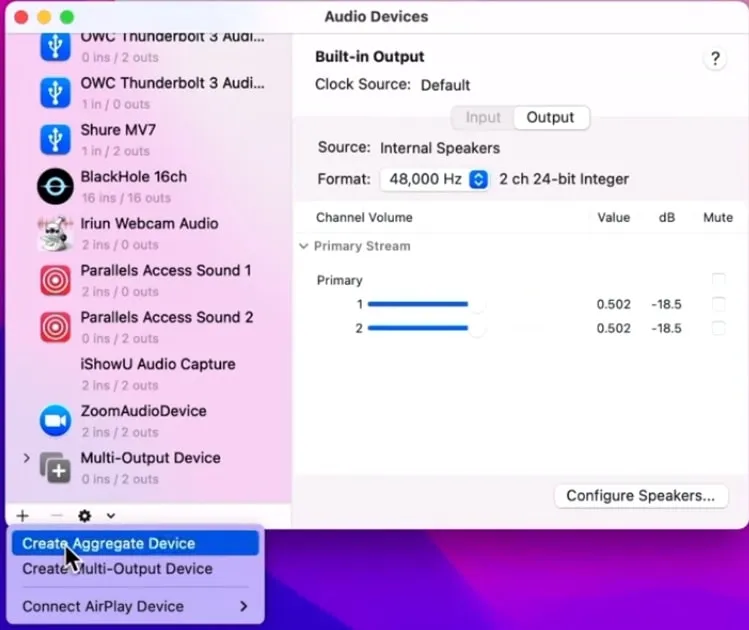
- Aggregate device will appear on the left side column, select “black hole 16 ch” for internal audio recording
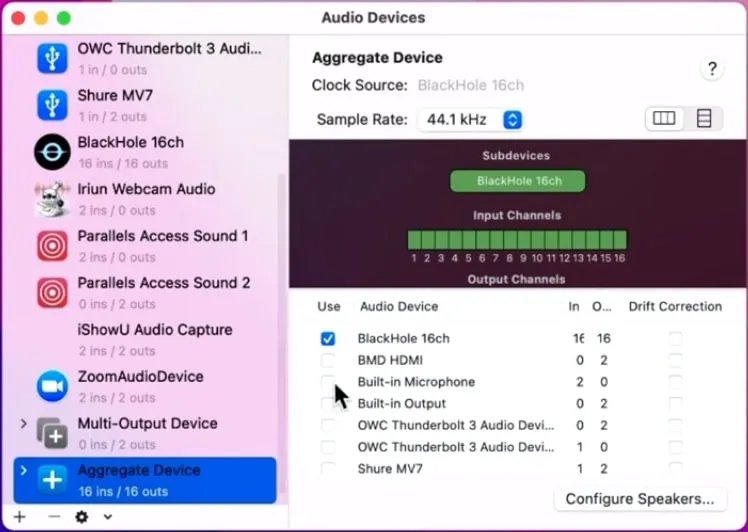
- If you also want record your own voice with internal voice, you can also “select the microphone”
- Press on “+” button and click “ create multi-output device”
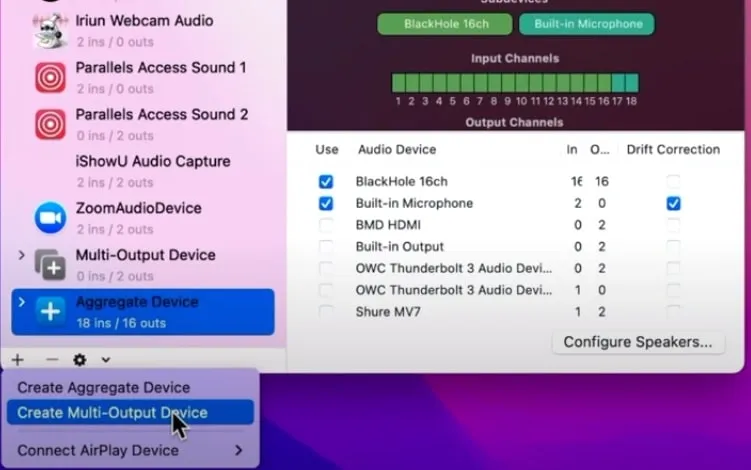
- Select “built-in output” and “blackhole 16ch”
- Now “rename both devices” so that you can remember it later on
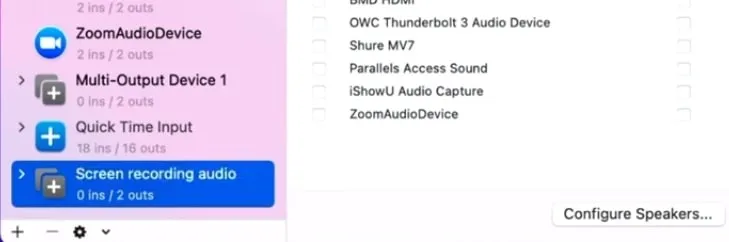
- Rename “aggregate devices” to “QuickTime input” and “multi out-put” to “screen recording audio”
- Now open “system preferences”
- The click “sound”
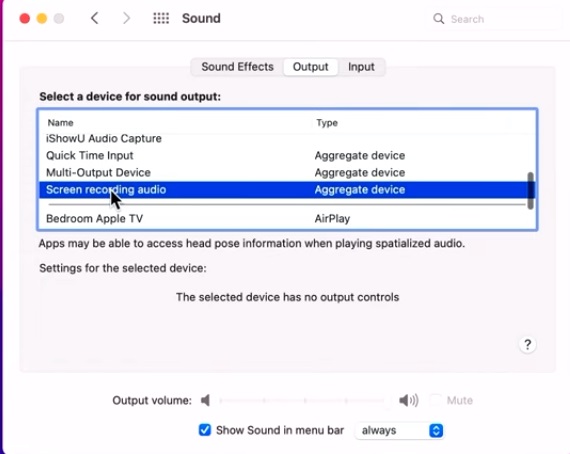
- Click on “output” tab, and select “screen recording audio” that you created
- Now open QuickTime player again, click “cancel” if any extra prompt appears
- Now go to “file” and click “new screen recording”
- Choose “QuickTime input” on the screen recording bar
- And click on “record” to start recording with internal audio
Third Party options to screen record on Mac with audio:
Sure, the built-in tool gets the job done, but these apps bring a whole new level of cool to the table. Some popular screen recording apps for Mac include ScreenFlow, Camtasia, and OBS Studio. These apps allow you to capture high-quality footage with advanced editing capabilities.
Screen recording on Mac with audio using OBS Studio:
OBS Studio is free screen recording software. Follow these steps to screen record on Mac with the audio using OBS studio

- “Download OBS studio” from the official website (download the version compatible with your mac on the basis of Intel or silicon based models)
- “Install” the OBS on your Mac
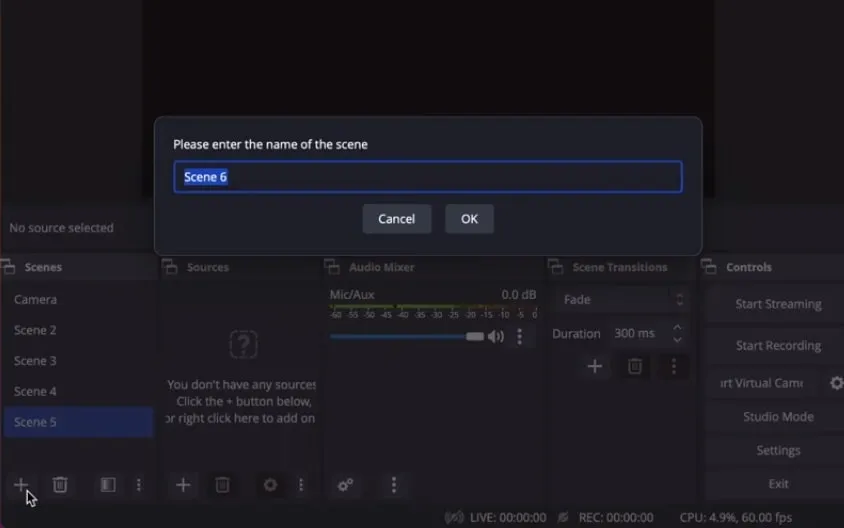
3. Now “launch” the OBS studio and create a “scene” by clicking on the plus button
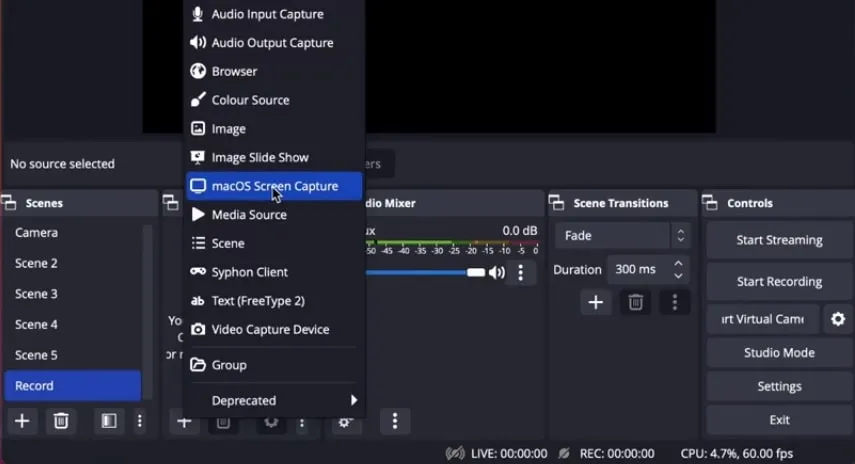
4. On the screen section click on “+” button and click on “macOS screen capture”
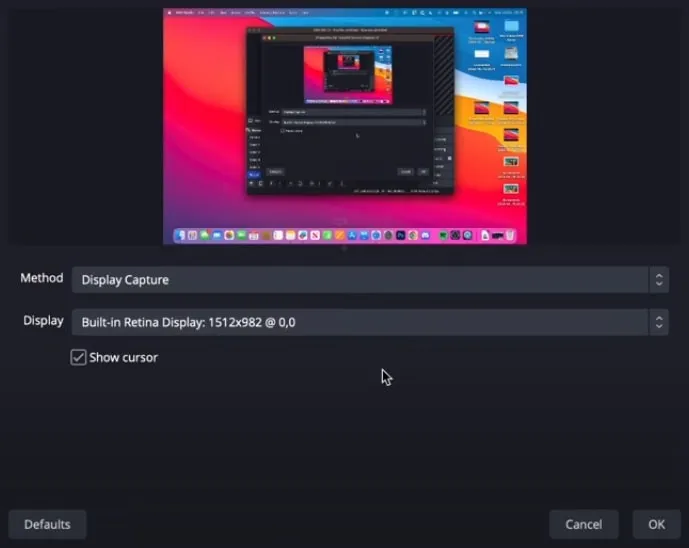
5. Press “ok”, select screen “display” type (single, multiple, default etc)
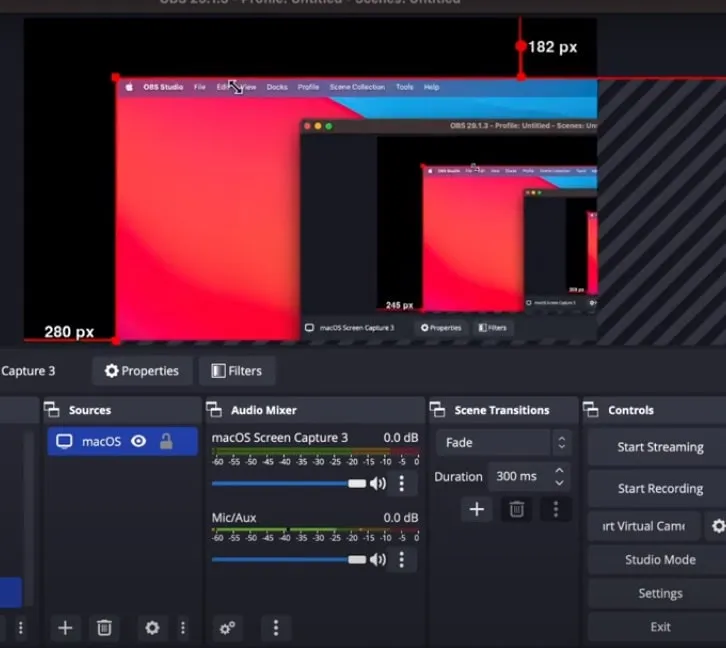
6. You can also “drag” the screen selection, or go to “settings” for further customization

7. On the settings navigate to “audio” and “select” the type of “audio input device”
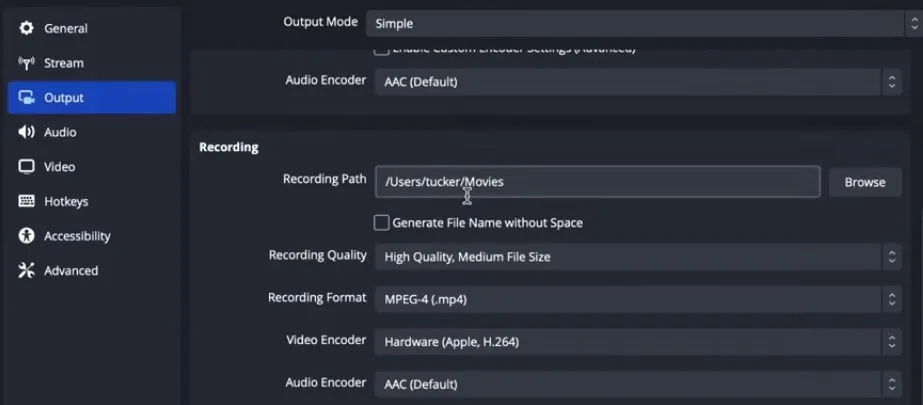
8. On the output tab, you can “select the path” where you would like your video to be saved

9. Now click on “start recording”
Other third party option for screen recording on Mac:
We have already discussed OBS studio as a third party software for screen recording on Mac with audio in complete detail. Here some other options, you can consider for screen recording on Mac.
ScreenFlow:
This all-in-one software is tailor-made for Mac users, offering a seamless experience from capture to edit. ScreenFlow might just be your new best friend. You get intuitive screen capture tools, top-notch editing features, and the freedom to spice up your recordings with audio narration, music, or effects. Plus, it’s got your back with multi-channel audio recording and the ability to snag system audio alongside your mic input.
Camtasia:
Camtasia is powerhouse screen recording software. Trusted by pros everywhere, this software is your go-to for creating professional-looking tutorials, presentations, and demonstrations. With Camtasia, you can capture high-quality screen recordings with audio, edit your footage using a range of editing tools and effects, and dazzle your audience by exporting your projects in various formats ready for online sharing or distribution.
Snagit:
Snagit is user-friendly software, it makes screen capture and recording easy as snapping your fingers. This tool takes the hassle out of taking screenshots, videos, Scrolling Screenshots, and even audio on your Mac.
With Snagit, you can breeze through screen recordings, add a dash of flair with text and graphics, and share your creations in a snap. Snagit is great for quick and simple screen recording tasks without breaking sweat.
Troubleshooting Screen Recording on Mac: Additional Tips
Screen recording on a Mac is usually a straightforward process, but like any technology, you can hit a snag here and there any time. Here are some additional tips for troubleshooting common problems and get back to recording like a pro in no time:
Check System Requirements:
Ensure that your Mac meets the minimum system requirements for the screen recording software that have opted for. Older Mac models or those with limited resources may have difficulty during screen recording facing slowness.
Update Software:
Keep your macOS and screen recording software up to date. Developers frequently release updates to fix those bugs, improve performance, and enhance compatibility with the latest hardware and software.
Restart Your Mac:
Give Your Mac a Breather: When in doubt, reboot. Sometimes, a simple restart can resolve minor software glitches or conflicts that may be affecting your screen recording. Restarting your Mac clears temporary files and refreshes system processes, potentially resolving any issues.
Close Background Applications:
Clear the Stage, running multiple applications at a time strains your Mac’s resources and cause performance issues during screen recording. Close those unnecessary applications feeling like good for nothing, running in the background to free up system resources for the recording process.
Check Disk Space:
Clear out some room, insufficient disk space can hinder the screen recording process and lead to errors or incomplete recordings. Before hitting record, double-check that you’ve got enough breathing room on your hard drive to accommodate the recording file.
Reset Recording Preferences:
When things go awry with third-party recording software, it’s like they have lost their groove. You can bring back the harmony by resetting preferences to their default settings. This action can resolve configuration-related issues that may be causing recording problems.
Test Different Settings:
Play around with different settings like frame rate, resolution, and audio inputs to discover the perfect combo for your recordings. fine-tuning those settings can improve performance and quality while reducing compatibility issues.
Update Drivers and Firmware:
Keep Things Updated, Just like your phone needs regular updates, so do your external devices for screen recording. Make sure your microphones and capture cards are running on the latest software by updating their drivers and firmware, ensuring they play nice with your recording setup. Compatibility issues between outdated drivers and macOS versions can cause recording problems.
Disable Graphics Acceleration:
Sometimes, your Mac’s graphics card can be a little too eager to help out with recording, causing more harm than good. They tend to use hardware acceleration for better performance. However, certain configurations or graphics drivers may not be fully compatible. If you’re running into issues, try giving it a break by temporarily turning off graphics acceleration in your recording software settings.
Test Different Recording Formats:
If one recording format isn’t playing nice with your Mac, don’t sweat it. Experiment with other formats supported by your recording software. Different formats may have varying compatibility and performance characteristics on your Mac. You might just stumble upon one format that clicks like magic, giving you smoother recording sessions without any glitches.
wrapping up:
- Screen recording on Mac with audio opens up a world of possibilities for tech content creators, passionate gamers looking to share epic moments with other, and for those who just want to preserve the memories .
- Whether using built-in tools like QuickTime Player or opting for third-party apps like ScreenFlow and Camtasia, Mac offers a plethora of options to capture your screen like a pro.
- Some of this party apps for screen recording on Mac not only make screen recording a breeze but also provide advanced editing features to enhance your recordings with audio narration, music, or effects.
- For smooth screen recording on mac, ensure your system meets minimum requirements, keep macOS and screen recording software up to date, close out unused applications, use a lighter file format and restart your macOS if your are running into some issues.
People Also Asked For:
how to end screen record on mac?
If you’re using QuickTime Player to record your screen, click on the “Stop Recording” button in the menu bar. You can also press the shortcut keys “Command + Control + Esc” to stop the recording.
how to screen record on mac with shortcut?
By default on Mac, you can Press “Command + Shift + 5” to bring up the screenshot toolbar then press “Control + Command + R” to start the recording
how to free screen record on Mac?
Using QuickTime Player, you can easily capture screen recordings on your Mac for free without the need for third-party software.
what are screen record mac apps for mac?
ScreenFlow: Professional-grade screen recording and video editing software for Mac.
Camtasia: User-friendly screen recording and video editing software with interactive elements.
OBS Studio: Free and open-source software for advanced screen recording and live streaming.
Snagit: Simple yet powerful screen capture and recording tool with basic editing features.
Capto: Versatile screen capture and recording app for Mac with annotation tools.
how to screen record mac with internal audio using quicktime?
For screen recording on Mac with internal audio using quicktime you will have to add a plugging called BlackHole.
what are the reasons for screen record on mac with no sound?
Screen recording on Mac may have no sound due to incorrect audio input settings or microphone permissions not granted to the recording application. Additionally, system audio may not be captured if the appropriate audio source is not selected during the recording setup.